I. Test Exceptions Overview
You may need to add test exceptions for students who need to take an online test at a different time, need extended time, or have other extenuating circumstances. The following can be created as test exceptions:
You may need to add test exceptions for students who need to take an online test at a different time, need extended time, or have other extenuating circumstances. The following can be created as test exceptions:
- Number of attempts
- Timer
- Availability
- Force completion
Depending on your testing policy, students who have experienced technical issues during the testing session may be provided with another attempt to re-take the test. However, as long as Force Completion was not checked for a test and the student did not run out of time, then he/she would be able to return to the test and complete it with the remaining time. For this reason, consider using a timer with or without auto-submit instead of the Force Completion setting.
II. How to Add Test Exceptions
To add test exceptions, you will need to access your deployed test in your Blackboard course and select Edit Test Options.
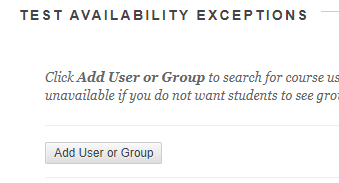
Scroll to the Test Availability Exceptions section of the test options, which can be found about midway down the page. Select Add User or Group.
On the window that pops up, you'll select one or all users or groups who need text exceptions added. Click the checkbox beside the user's name to select him/her, and after selecting all users or groups, click Submit.
Students will be added to the test exceptions category with the default settings of the quiz. For example, if the timer was set to 60 minutes and to auto-submit, then the students would by default be given these settings. If any of the settings are not turned on or selected for the test, then you will not have the option to change these in the test exceptions section.
In order to change the number of attempts a student might have, use the drop-down menu under Attempts to change to single attempt, multiple attempts and then the number of attempts, or unlimited attempts. You may choose to give some students multiple attempts because of internet accessibility issues during their testing session or other such reasons.
The time exception will allow you to give select students extra time on tests. This is especially useful for allowing extended time for students with testing accommodations.
Lastly, you can change the test availability by clicking on the calendar icon. Select the beginning date and time a student will have access tot he test in the After section, and select the date and time access will end of the selected student by entering this into the Until section.
Note: If you have selected a due date for the test and chosen the option "Do not allow students to start the Test if the due date has passed," then changing the availability options will NOT override the due date. You will have to uncheck this option on the due date in order for the student with test exceptions to take the test. You may then want to ensure other students do not have access to the test by changing the test availability until date in the overall test settings.


Comments
Post a Comment