
Student Preview Mode and Edit Mode in a Blackboard Course


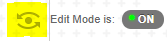
When you enter your Blackboard course and are adding content or reorganizing materials, you are likely in Edit Mode. Edit Mode allows you to add, delete, move, and change settings of the materials in your course. You can check to see that you're in Edit Mode by looking at the top right corner of your course. When in Edit Mode, the indicator will have a green dot and states that "Edit Mode is ON"


However, there are two other modes that you can enter: Edit Mode Off, and Student Preview Mode. The following chart highlights some of the basic differences between these two modes.

Edit Mode Off
Student Preview Mode
  • View the course from the student's perspective
  • Determine which items are hidden from the student's view due to availability settings, empty content, or adaptive release settings
  • Disable ability to add, delete, move, or change any settings of the materials in your course
  • Complete student activities such as taking tests, submitting assignment, posting in blogs, journals, wikis, or discussion boards
  • Move through adaptive release modules requiring assignment submissions, postings, or other graded items just as a student would
  • Save or not save student preview user data, such as assignment submissions and grades, when exiting this mode
  • View student tools such as My Grades

Edit Mode Off

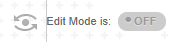
Sometimes you enter a course in Blackboard to find that you can't see what you typically see and that you can't make edits or add items. This is probably because you're viewing your Blackboard Course with Edit Mode Off. In order to toggle between edit mode on and off, simply click the ON or OFF button in the top right corner. You'll know you're in Edit Mode Off when you do not see a green dot and the indicator states that "Edit Mode is: OFF."


However, you might also purposely turn the Edit Mode off. This can be useful for checking to see if a test or item is truly set to be unavailable for students or an item you've recently added actually is available. In Edit Mode Off, you'll see availability in the same way your students will see availability. It's a quick way to ensure that students have access to the content you want them to have access to and do not have access to the content you do not want them to have access to.

Student Preview Mode

In Student Preview Mode, you can do everything you can in Edit Mode Off and then some. When you enter Student Preview Mode, you're actually entering your course as a student preview user. Unlike in Edit Mode Off, in Student Preview Mode, you can actually interact with the assignments and materials in the course just like a student would.

In order to enter student preview mode, click on the eyeball-looking icon in the top right corner, to the left of the edit mode on/off toggle button. 


You'll know you're in student preview mode because a yellow indicator bar stating "Student Preview Mode" will appear at the top of each page in your course.

In this mode, you can submit assignments, take tests, post on discussion boards, create blogs or journals, or edit Wiki pages just like students in your course can. You can also see which items are available for student view, and test out adaptive release features in your course.

In order to exit Student Preview mode, select "Exit Preview" in the right corner of the yellow student preview mode indicator bar.

Before you exit Student Preview Mode, you'll have the option to either delete the preview user data or keep the preview user data.


In most cases, you'll want to delete the preview user data. If you've posted in a discussion board, your enrolled students will be able to see and interact with the student preview user's post. If you've turned in assignment or taken quizzes, the student preview user will show up in the grade center like the other students in your course. 

Occasionally though, you may want to practice grading an assignment you've turned in to test out something like the in-line grading features through Crocodoc. Sometimes you'll want to assign a grade to the preview user, return as the preview user, and see how the adaptive release feature is functioning in your course, or you may want to return as the preview user and see how students receive feedback on assignments using rubrics in their "My Grades" section.  In these instances, you would choose to "Keep the preview user and all data."

For more information about Student Preview Mode, please view the following support video from Blackboard: Student Preview


Comments

Popular posts from this blog

Color Coding in Blackboard Grade Center

You have probably spent plenty of time in the Blackboard Grade Center. Sometimes, the Grade Center can feel a bit overwhelming and difficult to navigate. One way to make navigating the Grade Center easier is to color code your cells. Setting up color coordinated cells can help you easily identify high grades, low grades, and patterns in student work. In this entry, we will show you how to set up color codes in your Grade Center. In the Grade Center, navigate to the manage tab and select "Grading Color Codes." Color coding is disabled by default, so make sure to check the box at the top of the page to enable the display of colors. You will find two sets of options for customizing Grading Color Codes Grading Status allows you to alter the background color for empty cells. This applies to cells in Needs Grading, In Progress, or Exempt status. In the example below, the chosen background colors emphasize the colors used in each status icon. Here is wh

Voice Typing and Student Feedback

The following is a guest post by Dr. Marshall Jones. Dr. Jones is Professor and Senior Director of Learning Technologies and Graduate Studies in the Richard W. Riley College of Education at Winthrop University in Rock Hill, SC USA. Dr. Jones teaches graduate courses in Learning Design and Technology and undergraduate courses in technology integration. His research interests and consulting experience include project evaluation, instructional design, mobile learning, elearning, the design and development of constructivist learning environments, emerging technologies, learning analytics and new media.  For me, one of the most difficult things about teaching online is all of the typing that has to be done. Discussion boards, emails, feedback on assignments, EVERYTHING has to be typed. And even if you're a very fast typist and accurate typist (I’m neither), it will take you a long time. Recently, I've been using voice typing in Google Docs as a way to cut down on typing time. Voic

Winthrop Online Teaching Certification Courses

As part of The Winthrop Online Teaching Certification (WOTC), the Winthrop Office of Online Learning (WOOL) administers training through two levels which are taught in two online training courses: WOTC 101: Online Course Design and Development Basic, and WOTC 102: Online Course Facilitation and Management. WOTC 101: Online Course Design and Development Basics is the first of two courses offered in the Winthrop Online Teaching Certification. This course introduces participants to the theories behind online learning. Participants will learn the basics of how to design and develop an online course using the Blackboard learning management system. WOTC 102: Online Course Facilitation and Management is the second of two courses offered in the Winthrop Online Teaching Certification. This course teaches the technical and procedural skills integral to facilitating and managing an online course. Participants will master skills learned in the WOTC 101 course in order to design and delive