A few weeks ago, we posted instructions for exporting your course gradebooks to keep for your records. This week, we are going to help you take your summer “housekeeping” a step further by detailing how, and why, to export or archive your courses.
When you export or archive a course from Blackboard, your course is condensed into a single ZIP folder that you can save to a computer or storage device for safe keeping. In both instances, your course layout, assignments, exams, grading schemas, adaptive release criteria, etc, are preserved within this ZIP folder. This ZIP folder can then be uploaded into Blackboard at a later date to recreate these components.
However, archiving and exporting differ in one very important area: exporting a course does not preserve student data, whereas archiving a course does preserve student data. When archiving a course, the final ZIP folder also contains student enrollment, assignment submissions, grades, discussion board and wiki contributions, and generally all student interactions within the course. Therefore, while the process for exporting or archiving a course is almost identical, as we will see below, the practical uses for each of these functions is markedly different.
Why Would I Export a Course?
The primary reason to export a course is if you plan on teaching the course again.If you have ever had your Blackboard course copied over from one section to another, say Fall 2016 to Spring 2017, you are already familiar with how an exported course will work once uploaded back into Blackboard. When you import your course from the ZIP file, your content areas, assignments, tests, gradebook, etc are all recreated into the new course, and new students for that section are automatically populated prior to the start of the semester.
At Winthrop, your previous courses are available in Blackboard for a full academic year, so courses taught regularly can often just be copied from one semester to another. However, if you teach your course more intermittently, having your course saved as a ZIP file can both simplify the process of building your course, and save you time while doing so.
While the Office of Online Learning keeps backups of all courses, having a course ZIP file allows you to import the components of your course whenever you would like, without the need to search through older courses to copy from.
Why Would I Archive a Course?
While your Blackboard courses themselves remain available for a full academic year, student enrollments in the course are deactivated around a month after the course has concluded. This makes reviewing student work or interaction data for, say, an annual report, more difficult. While student enrollments can always be reactivated manually, having an archived course makes doing so unnecessary.
Because archiving a course preserves all aspects of student interaction in the course, it is an ideal tool for record keeping. From an archived course, you can mine data for your annual report, observe what worked or did not work in the course, or capture model student work to offer in future courses.
Unlike exported courses, archived courses cannot simply be imported. They must be restored by the Office of Online Learning. If you have a ZIP file of an archived course you would like restored, please email us here at the Office of Online Learning and we will coordinate with you to get the course restored for you. You can reach us at instructionaldesign@winthrop.edu.
Exporting
a Course
|
Archiving
a Course
|
|
|
Ideal for
|
|
|
|
How to Export or Archive a Course
While exporting and archiving a course produce slightly different content, the process for requesting the ZIP files are practically the same.- Log into Blackboard and navigate to the course you wish to export/archive
- Under the control panel, navigate to Packages & Utilities drop down menu, and select “Export/Archive Course” (Figure A)
- Select the appropriate option – export or archive. Leave the File Attachments section with their default options.
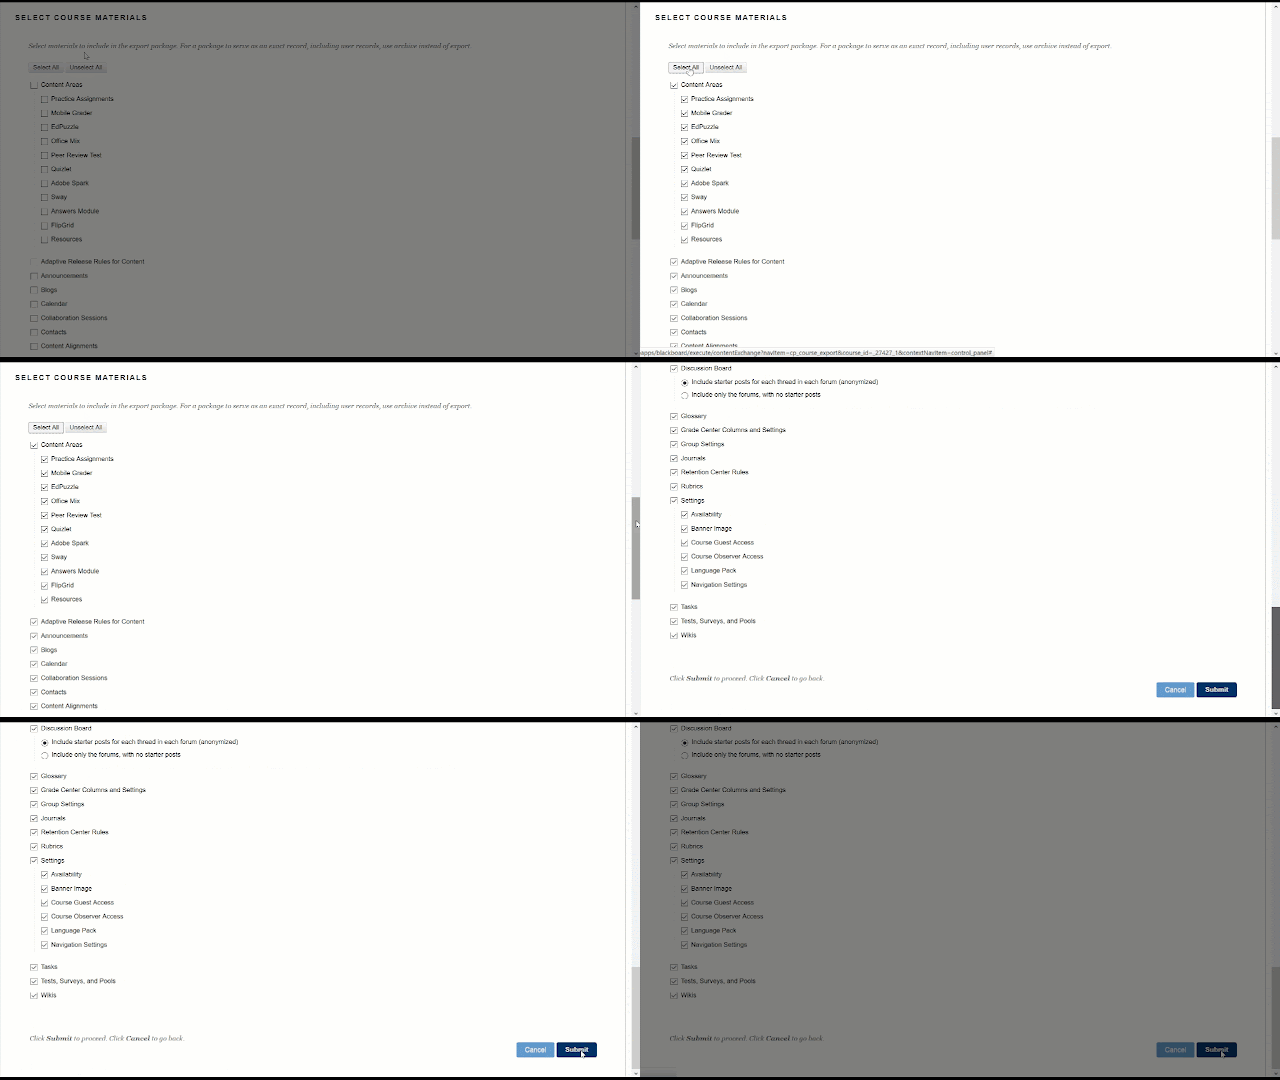
- If you are exporting a course, you can opt to only include specific components of the course. It is strongly advised that you “select all” course materials when exported, as doing so ensures that grade center entries, rules, and adaptive release criteria do not become broken. (Figure B)
- If archiving, select the check box to “Include Grade Center History.” (Figure C)
- Select “Submit” at the bottom of the page to being the process. You will receive an email once the process has been completed. Once completed, you will find the ZIP file on the Export/Archive pages, where can save it to your computer or storage device.
Importing an Exported Course
- Log into Blackboard and enter the course you would like to restore the Zip File into.
- Navigate to “Import Package / View Logs” under Packages and Utilities. Select “Import Package”
- Select “Browse my computer” and select the exported ZIP File (Figure D)
- Select course materials to include. Choosing to “select all” will create a course nearly identical to the original. (Figure E)
Figures A - E are included below for reference. If you have any questions about this process, need
assistance or clarification, please do not hesitate to get in touch with us
here at WOOL. We are always happy to help!
Figure A: Selecting Import/Archive Course

Figure B: Selecting all course materials


Comments
Post a Comment